Googleログイン認証をWebサイトに組み込む
Googleログイン認証をAngularを使ったWebサイトに組み込む手順を解説します。
動作イメージ
Google API クライアント ID を取得する
Google API クライアント ID を取得するの手順に従い、Google API クライアント IDを取得します。
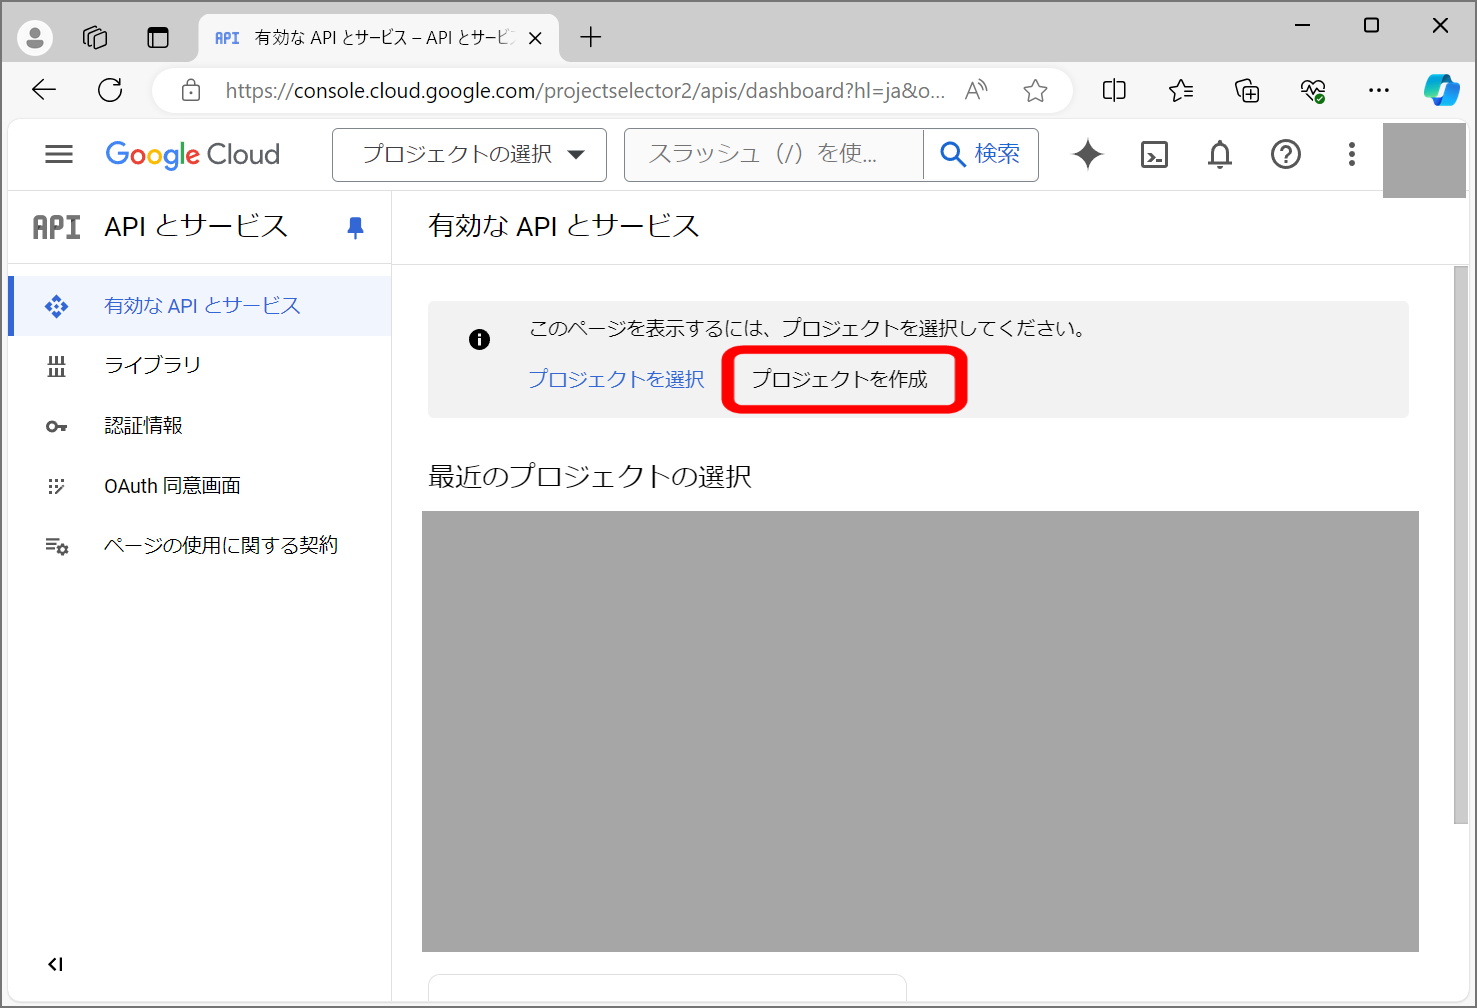
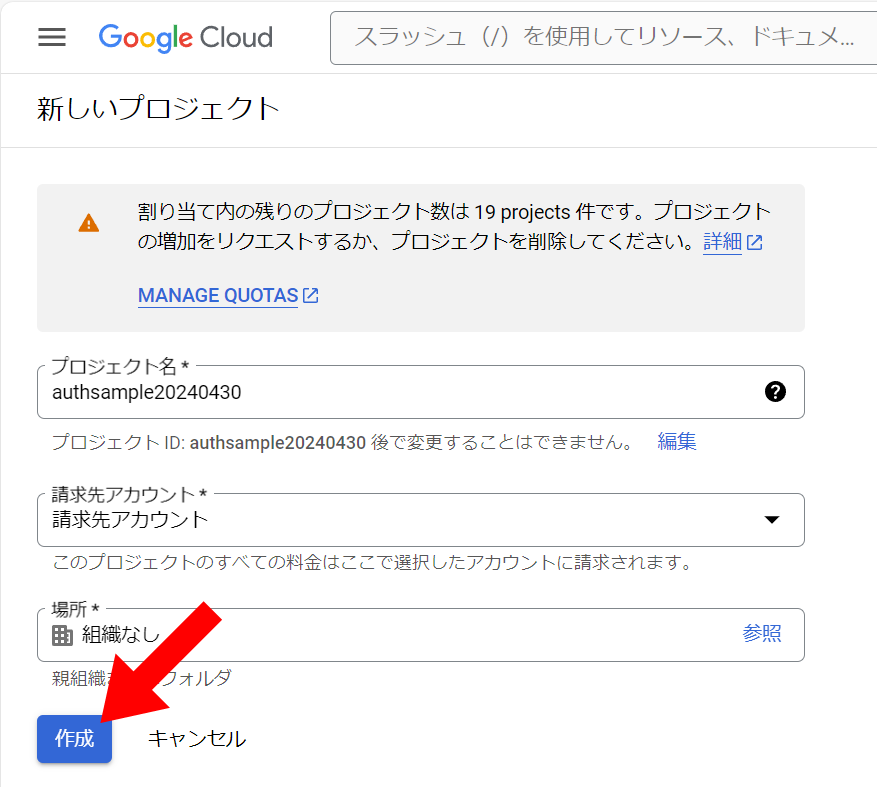
👇プロジェクトを作成
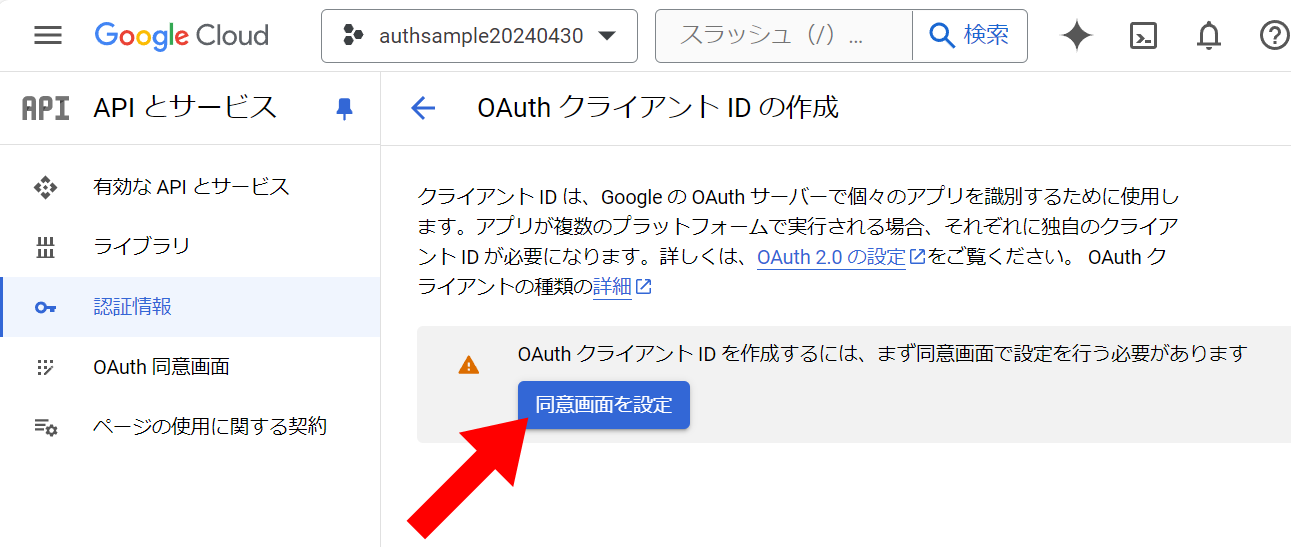
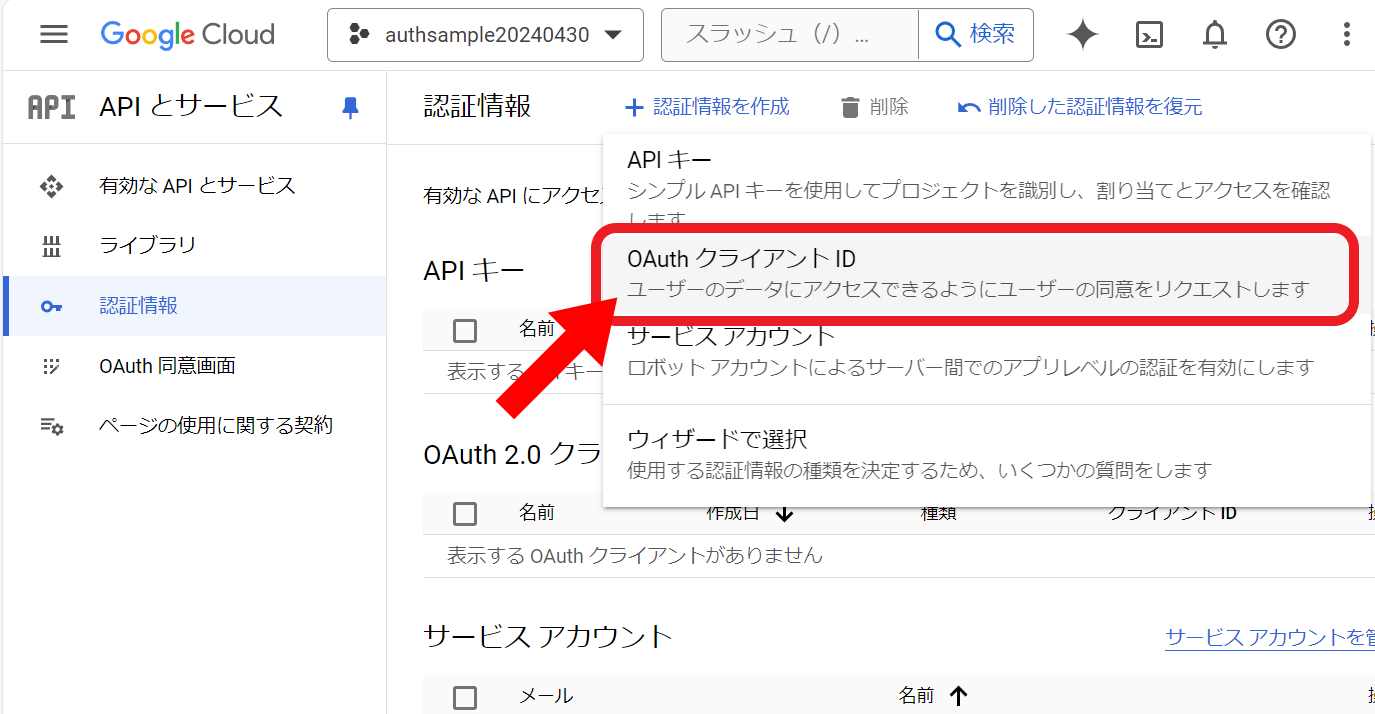
👇認証情報(OAuthクライアントID)を作成

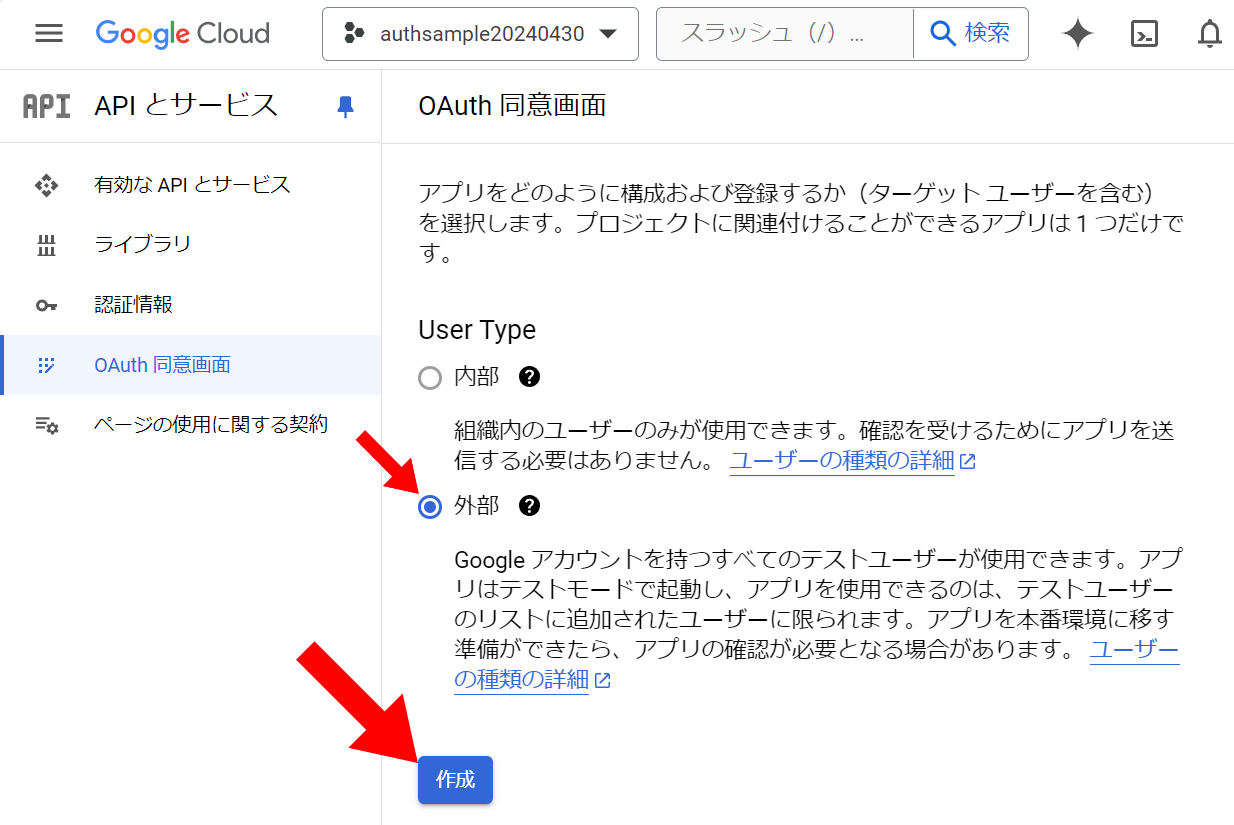
👇同意画面を設定
👇UserType:外部を指定し作成
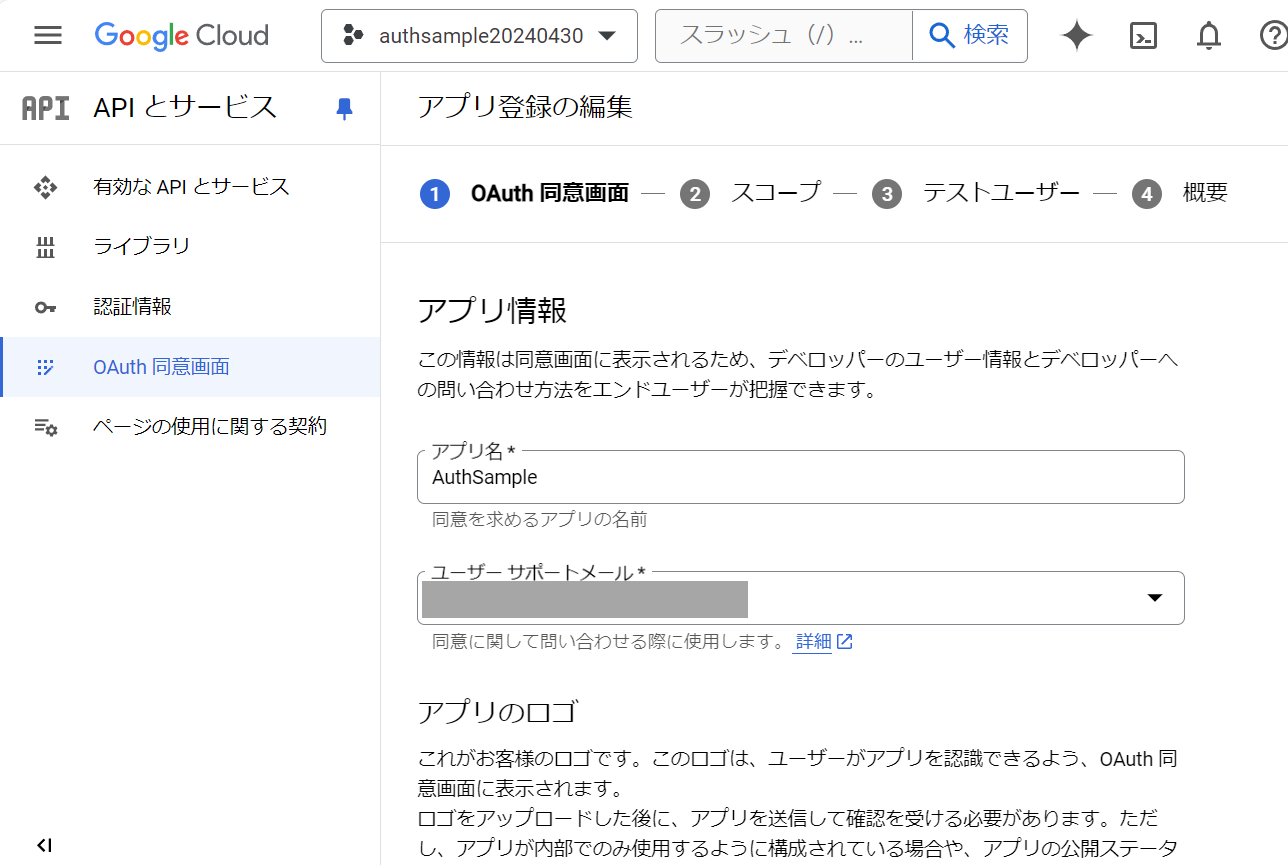
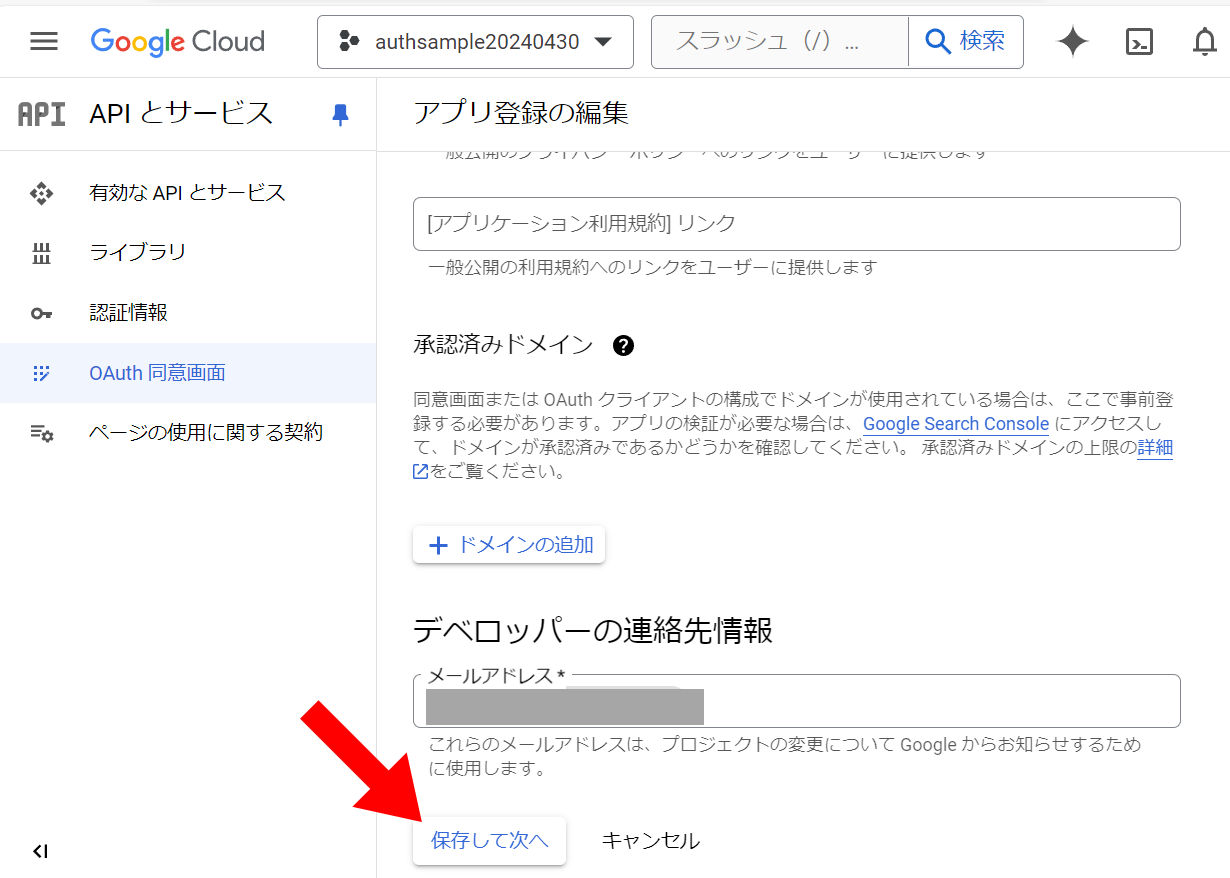
👇アプリ情報を設定
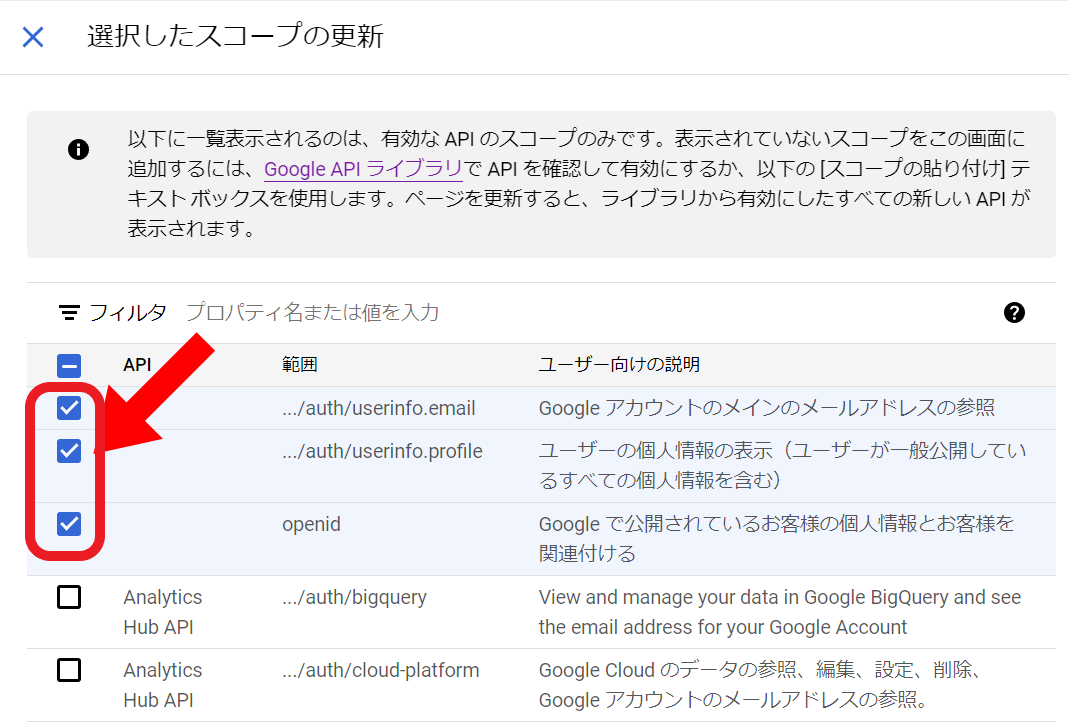
👇スコープを追加

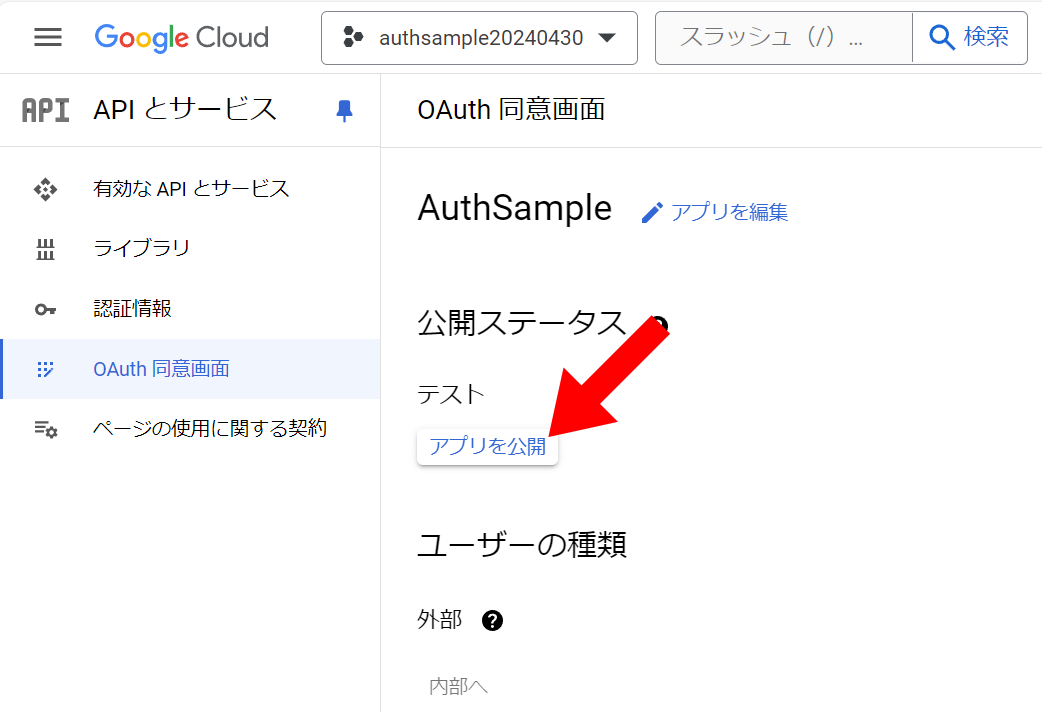
👇アプリを公開
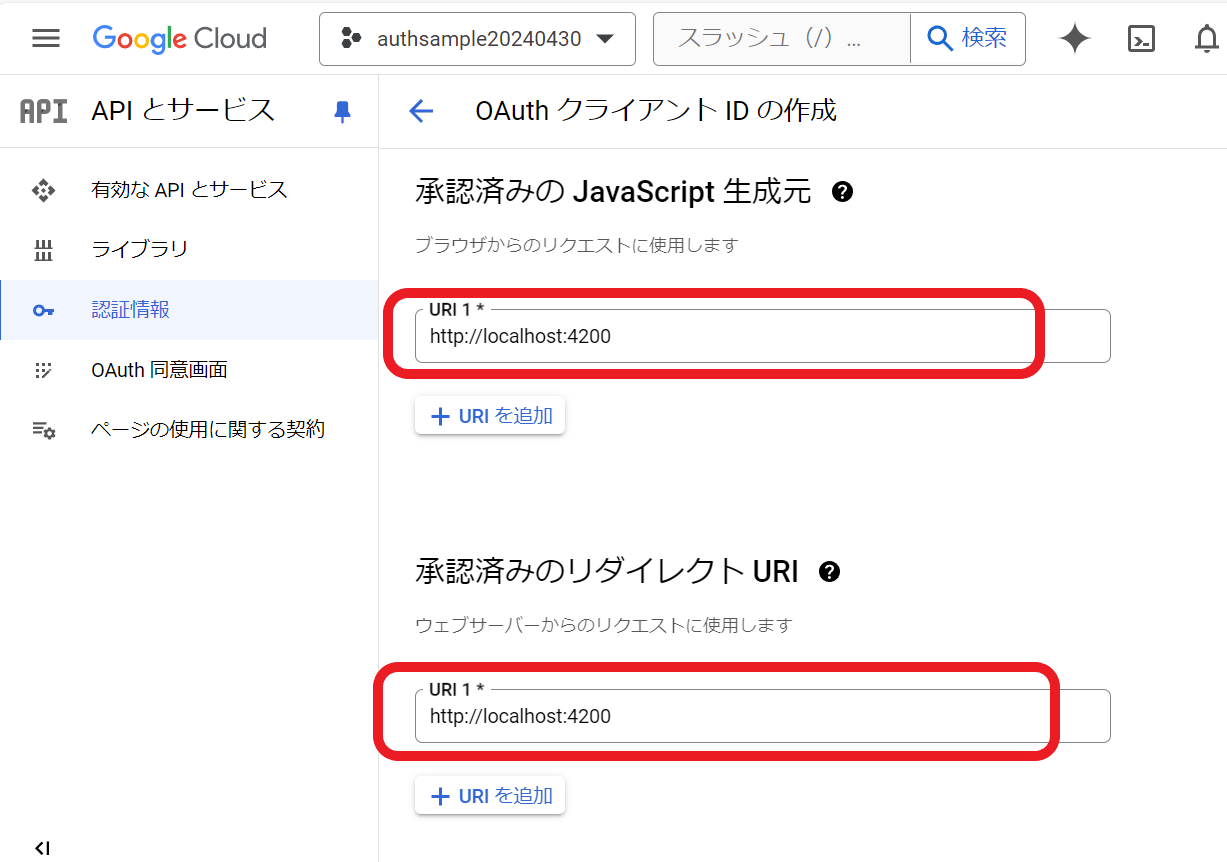
👇認証情報(OAuthクライアントID)を作成
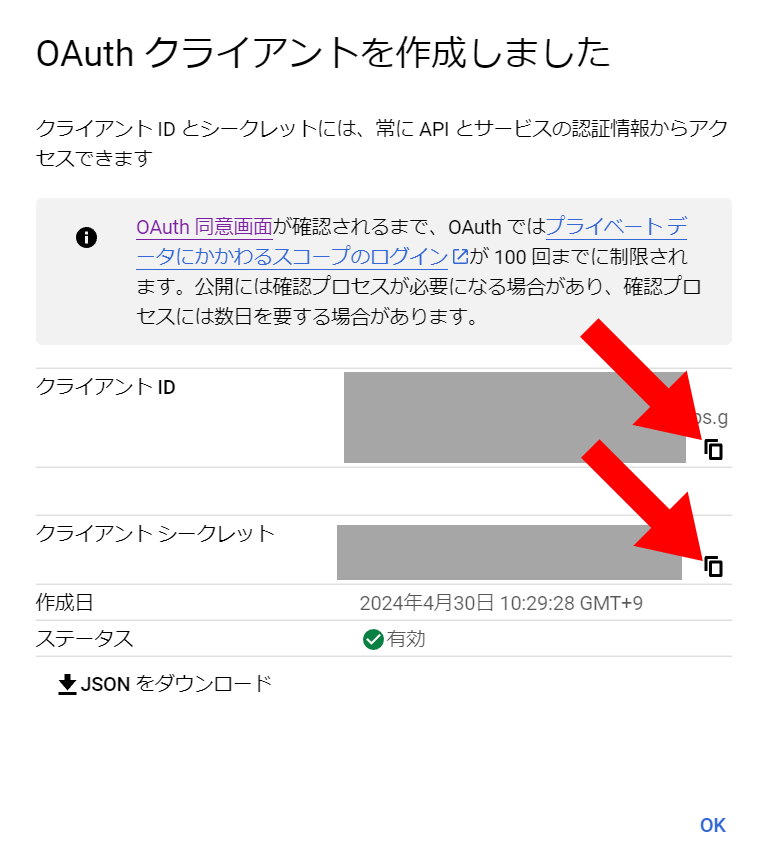
👇クライアントID/クライアントシークレットをコピー
Angular 構成の準備
以降の手順は以下記事の内容を前提とします。
Angularのインストール~最小限構成の設定手順
Google認証の実装
Google に認証リクエストを送信する
👇認証リクエストを送信
https://accounts.google.com/o/oauth2/v2/auth?response_type=code&client_id=[クライアントID]&scope=openid%20email%20profile&redirect_uri=http%3A//localhost%3A4200&nonce=20240308&access_type=offline
👇リダイレクトされたURLパラメータから認証トークンを取得します
  ngOnInit(): void {

    let tmp_code = this.getParamValue("code");

  }

  getParamValue(key: string): string{
    let ret_value = "";
    if(location.search.substring(1) != ""){
        var pair = location.search.substring(1).split('&');
        for(var i=0;pair[i];i++) {
            var kv = pair[i].split('=');
            if(kv[0] == key){
                ret_value = kv[1];
                break;
            }
        }
    }
    return ret_value;
  }
認証トークンからアクセストークンを取得する
👇認証トークンからアクセストークンを取得する
※ 認証トークンはdecodeURIComponent関数でURIデコードする必要があります
  ngOnInit(): void {

    let tmp_code = this.getParamValue("code");

    if (tmp_code){
        this.get_auth_code(tmp_code);
    }

  }

  get_auth_code(code_value:string): void{

    let httpHeaders = new HttpHeaders({
      'Content-Type' : 'application/x-www-form-urlencoded',
        });

    let options = {
      headers: httpHeaders,
    };
    const postParam = new HttpParams()
      .set("code",decodeURIComponent(code_value))
      .set("client_id",AppComponent.CLIENT_ID)
      .set("client_secret",AppComponent.CLIENT_SECRET)
      .set("redirect_uri","http://localhost:4200")
      .set("grant_type","authorization_code")

    const url = "https://oauth2.googleapis.com/token"
    console.log(postParam)
    this.http.post<any>(url, postParam, options).subscribe({
      next:(data) => {
        if("access_token" in data){
          sessionStorage.setItem(AppComponent.ACCESS_TOKEN_SAVE_KEY,data["access_token"]);
          this.access_token = data["access_token"];
        }

        if("refresh_token" in data){
          localStorage.setItem(AppComponent.REFRESH_TOKEN_SAVE_KEY,data["refresh_token"])
        }
      },
      error:(e) =>{
        console.log("NG");
        console.error(e);
      },
      complete: () => {
        console.log("complete");
      }
    })
  }
ユーザー プロフィール情報の取得
  buttonClickFunc(): void{

    let httpHeaders = new HttpHeaders({
      'Content-Type' : 'application/json',
      'Authorization' : 'Bearer ' + this.access_token
        });

    let options = {
      headers: httpHeaders,
    };

    const url = "https://openidconnect.googleapis.com/v1/userinfo"

    this.http.get<any>(url, options).subscribe({
      next:(data) => {
        console.log("ok");
        console.log(data);
      },
      error:(e) =>{
        console.log("NG");
        console.error(e);
      },
      complete: () => {
        console.log("complete");
      }
    })


  }
👇関連記事
👇参考URL
本記事へのリンク

https://docs.saurus12.com/frontend/google_auth
[keywords]
Googleログイン OAuth Angular
更新日:2024年04月30日

