SeleniumでのXPath参照、ファイルダウンロード、確認ダイアログ操作を解説
PythonでSeleniumを使う場合の、XPath参照、ファイルダウンロード、確認ダイアログ操作を解説します。
Selenium導入
下記コマンドでSeleniumを導入します。
pip install selenium
Chrome Driver ダウンロード
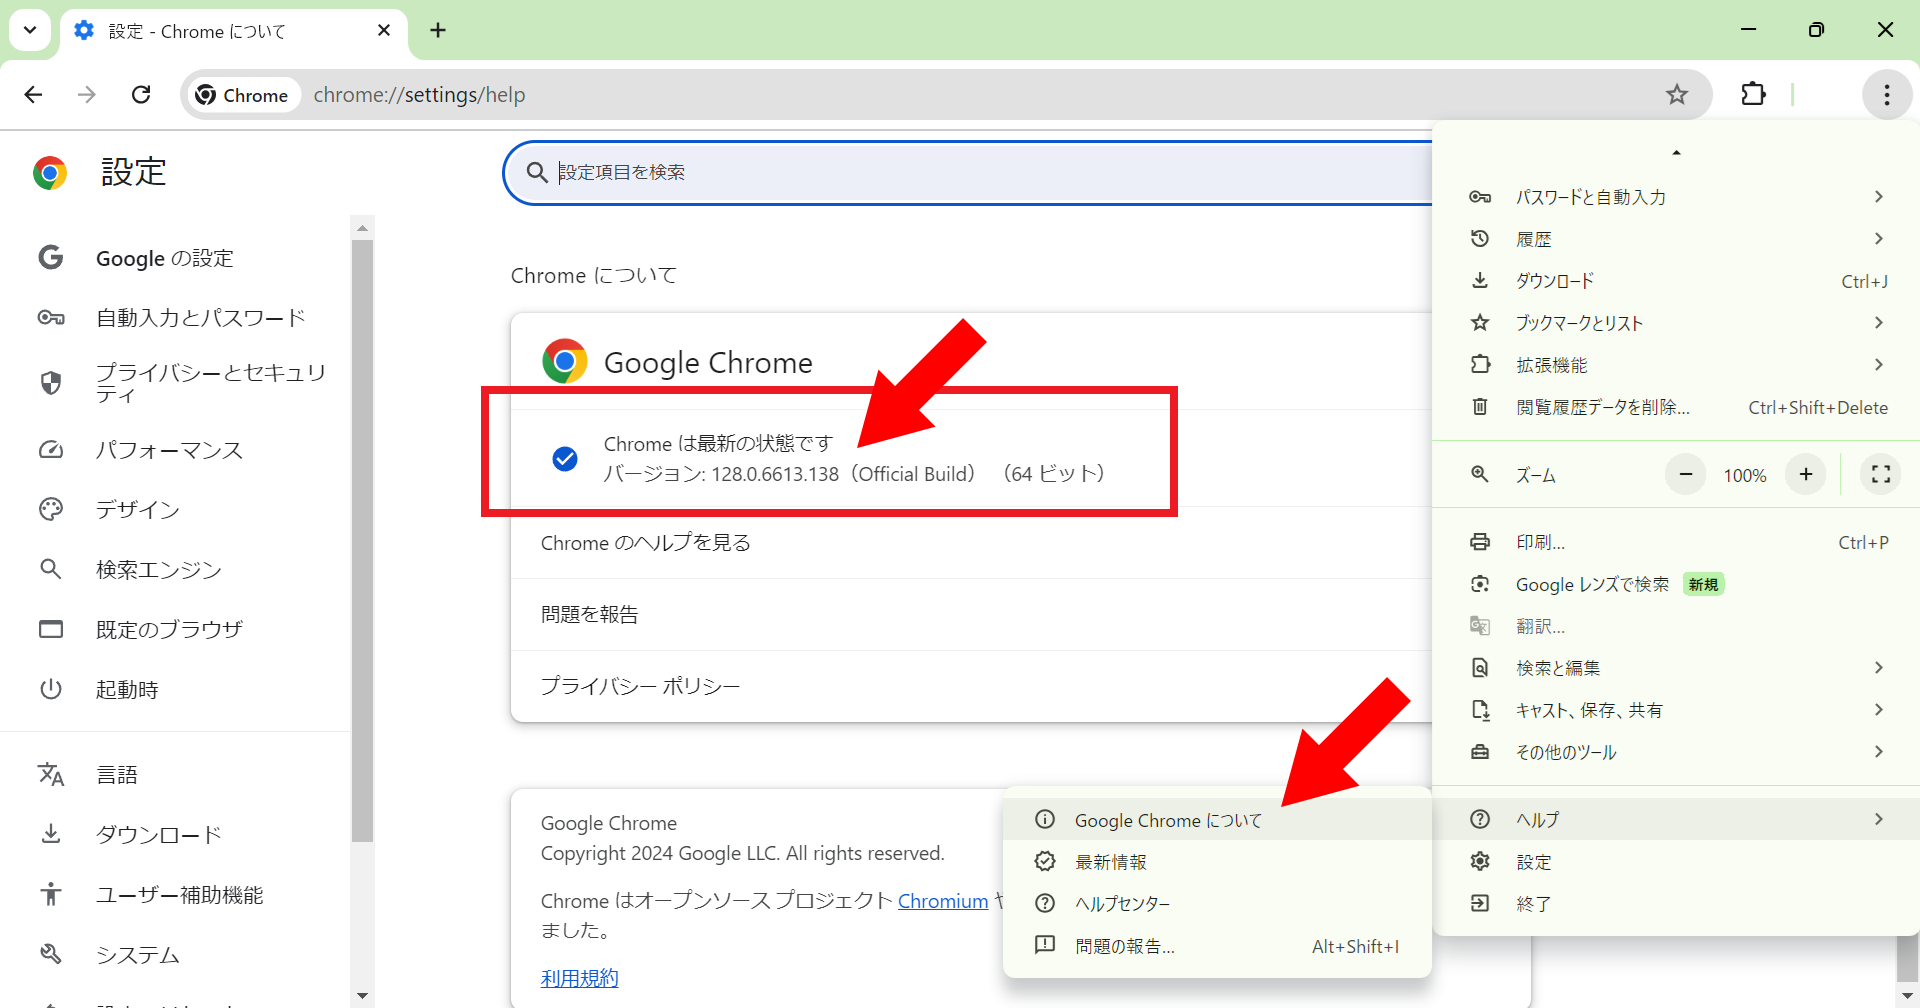
まず、Chromeのバージョンを確認します。(バージョンはヘルプ-Google Chromeについてから確認できます。)
本記事記載時点ではバージョン128でした。
下記サイトからバージョンの一致するchrome driverをダウンロードします。
Chrome for Testing
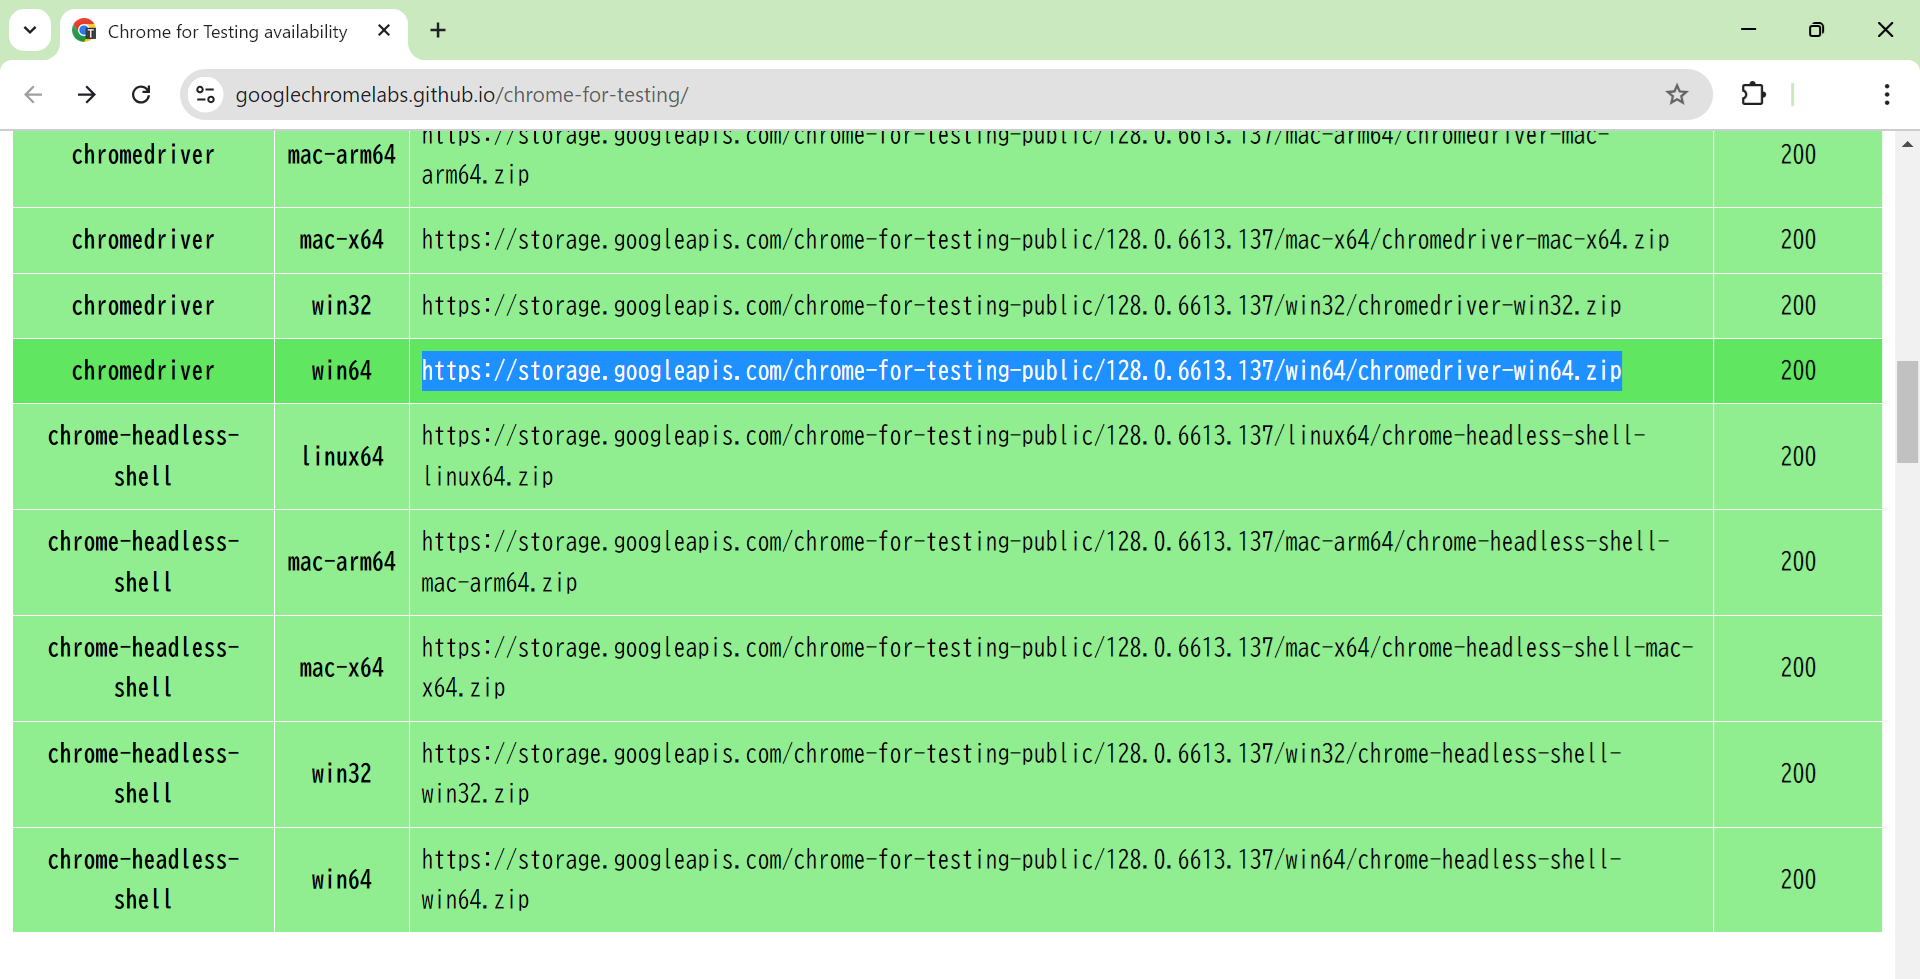
URLをコピーしてブラウザへ貼り付けるとダウンロードできます。
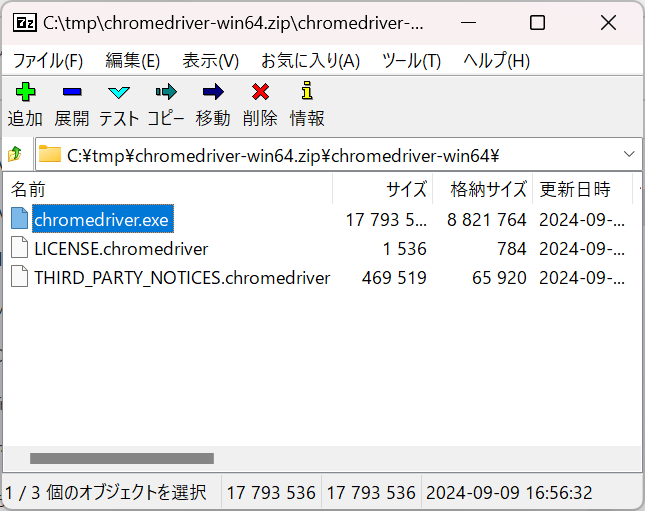
圧縮ファイルに含まれるchromedriver.exeをパスの通ったフォルダ(C:\windows\system32 等)へ配置します。
Seleniumの起動とURL参照
from selenium import webdriver
from selenium.webdriver.common.by import By
from selenium.webdriver.common.alert import Alert

driver = webdriver.Chrome()
driver.get("https://www.seleniumqref.com/index.html")
Xpath参照
Seleniumでリンクをクリックしたり、ボタンを押したりして自動操作を実現する際、対象の要素を特定するのにXPath参照を使うと便利です。
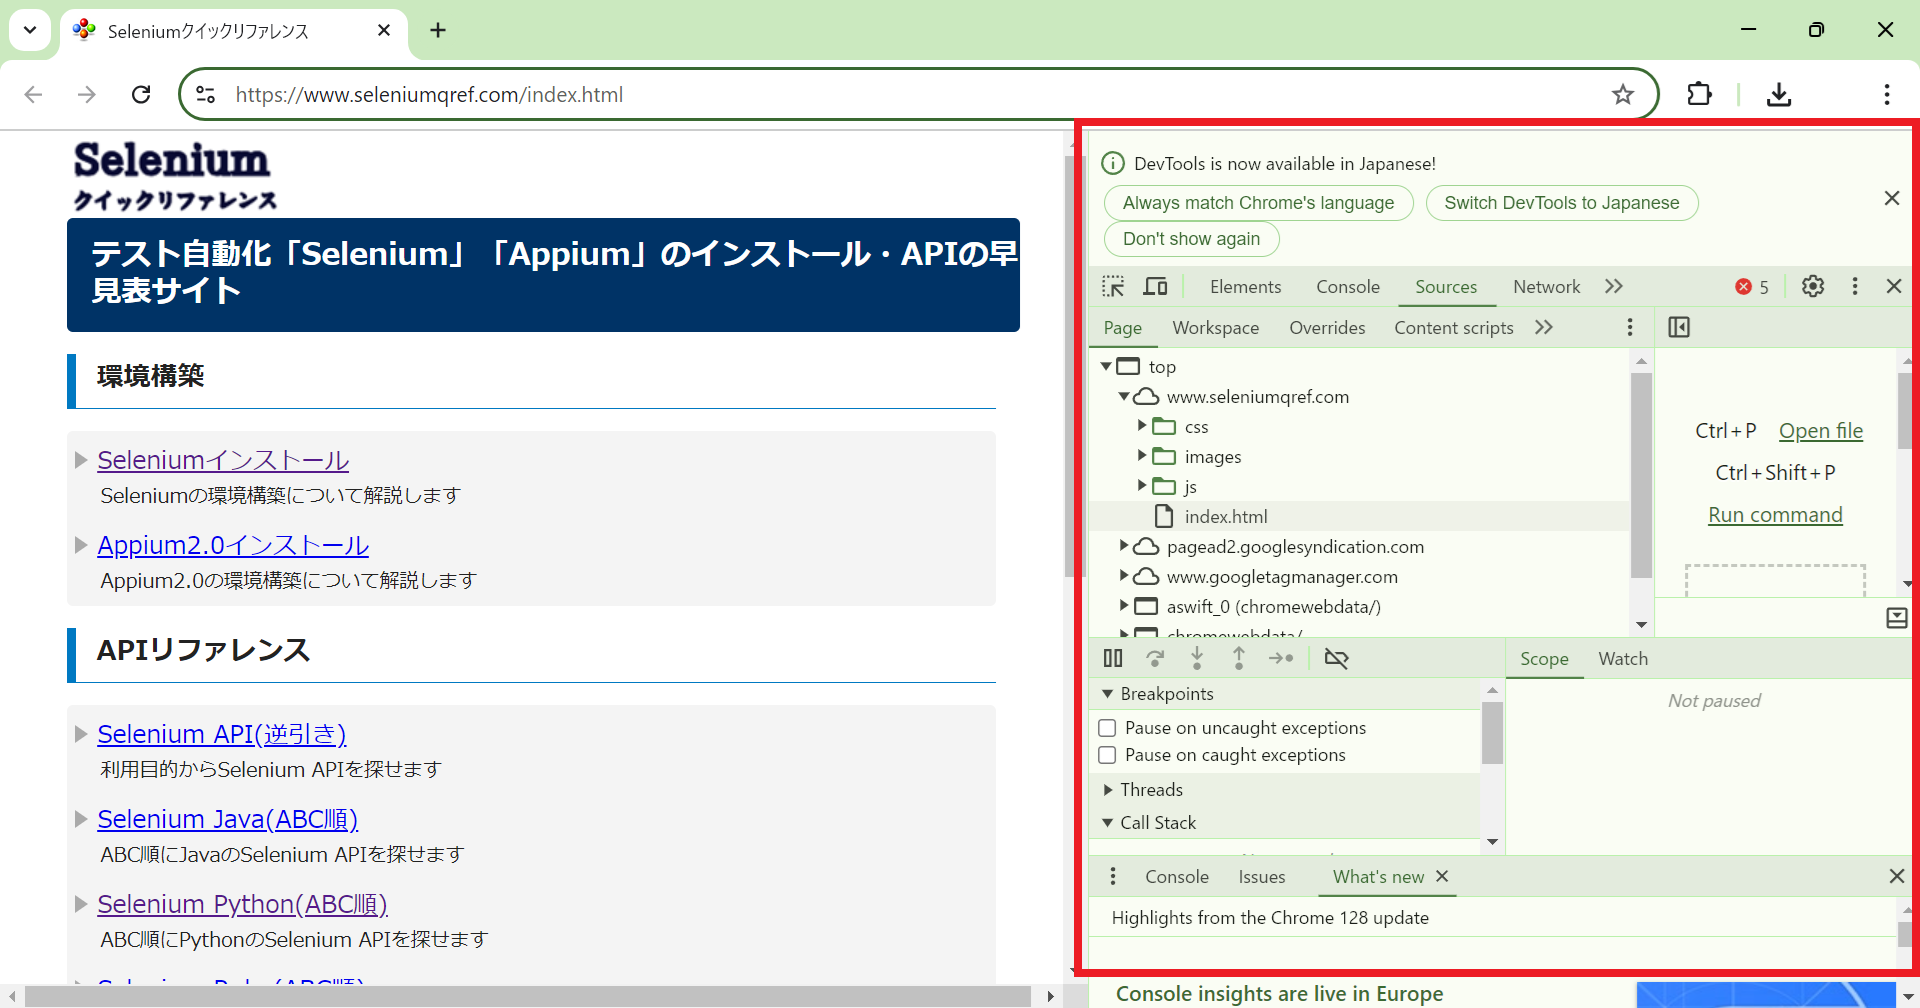
👆まず、F12を押して開発者ツールを起動します。
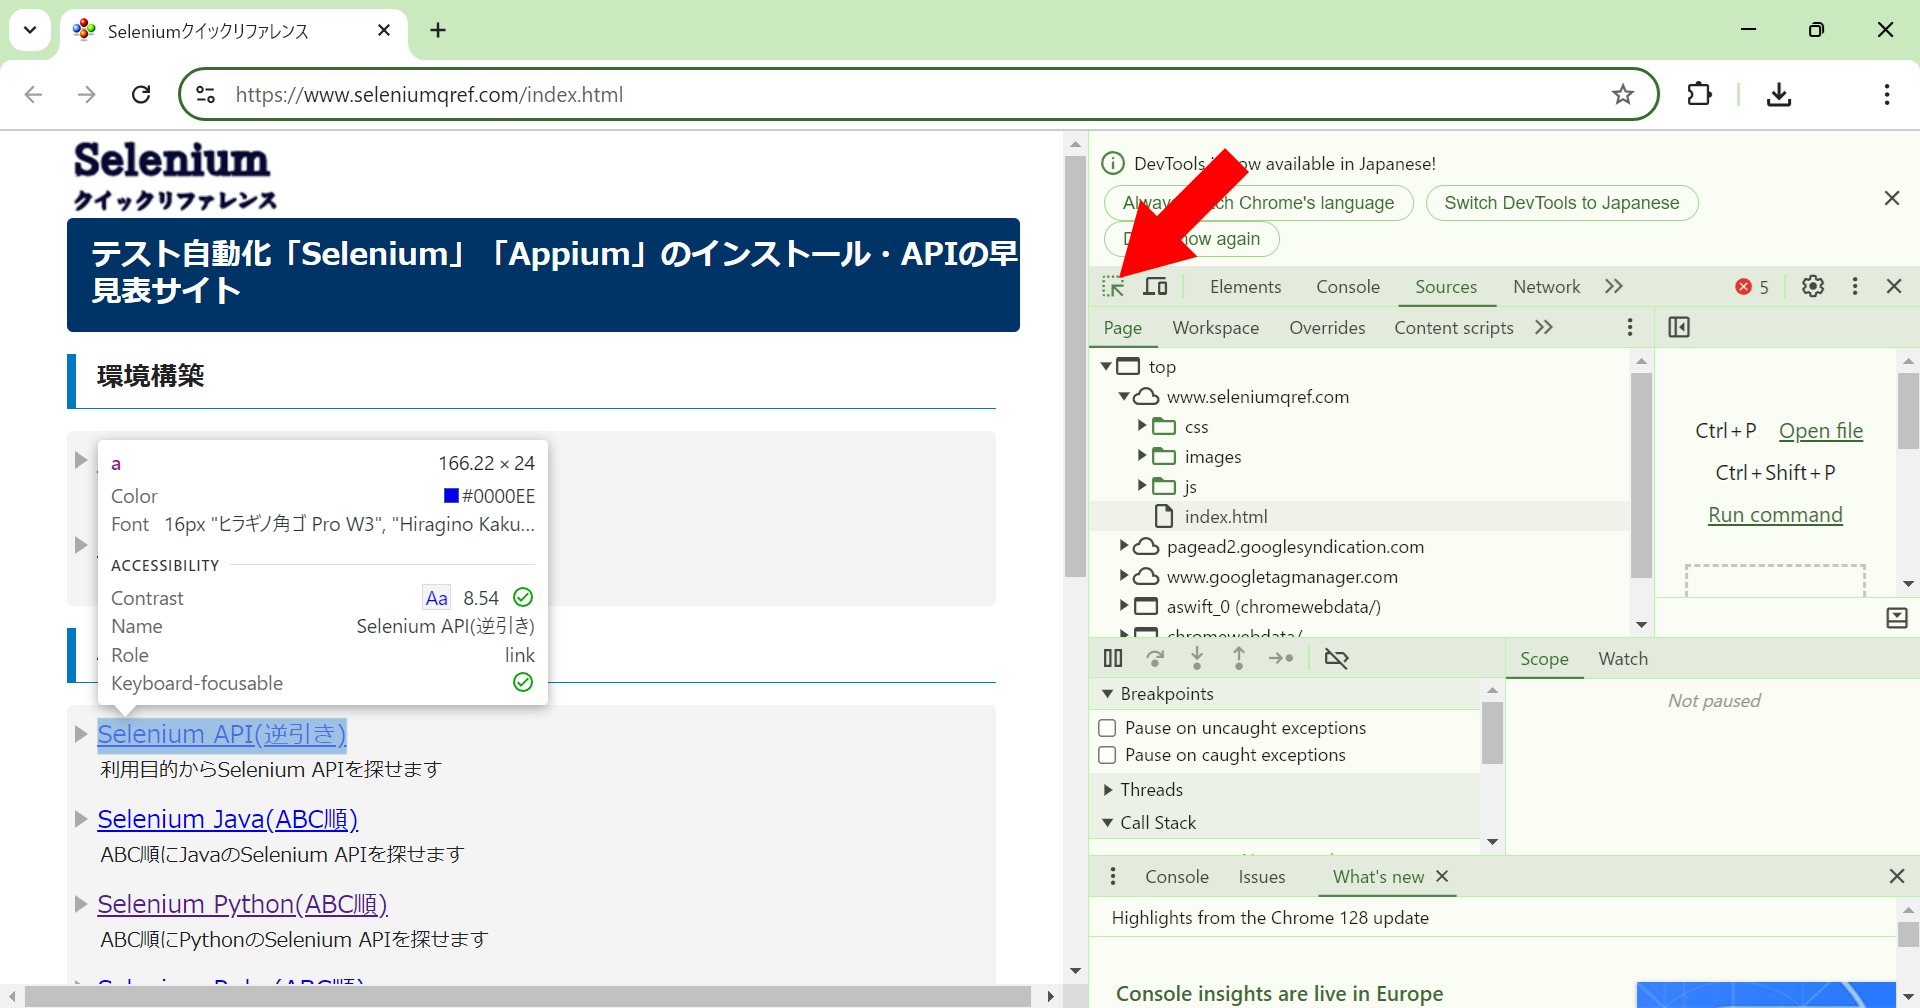
👆要素セレクターをクリックします。
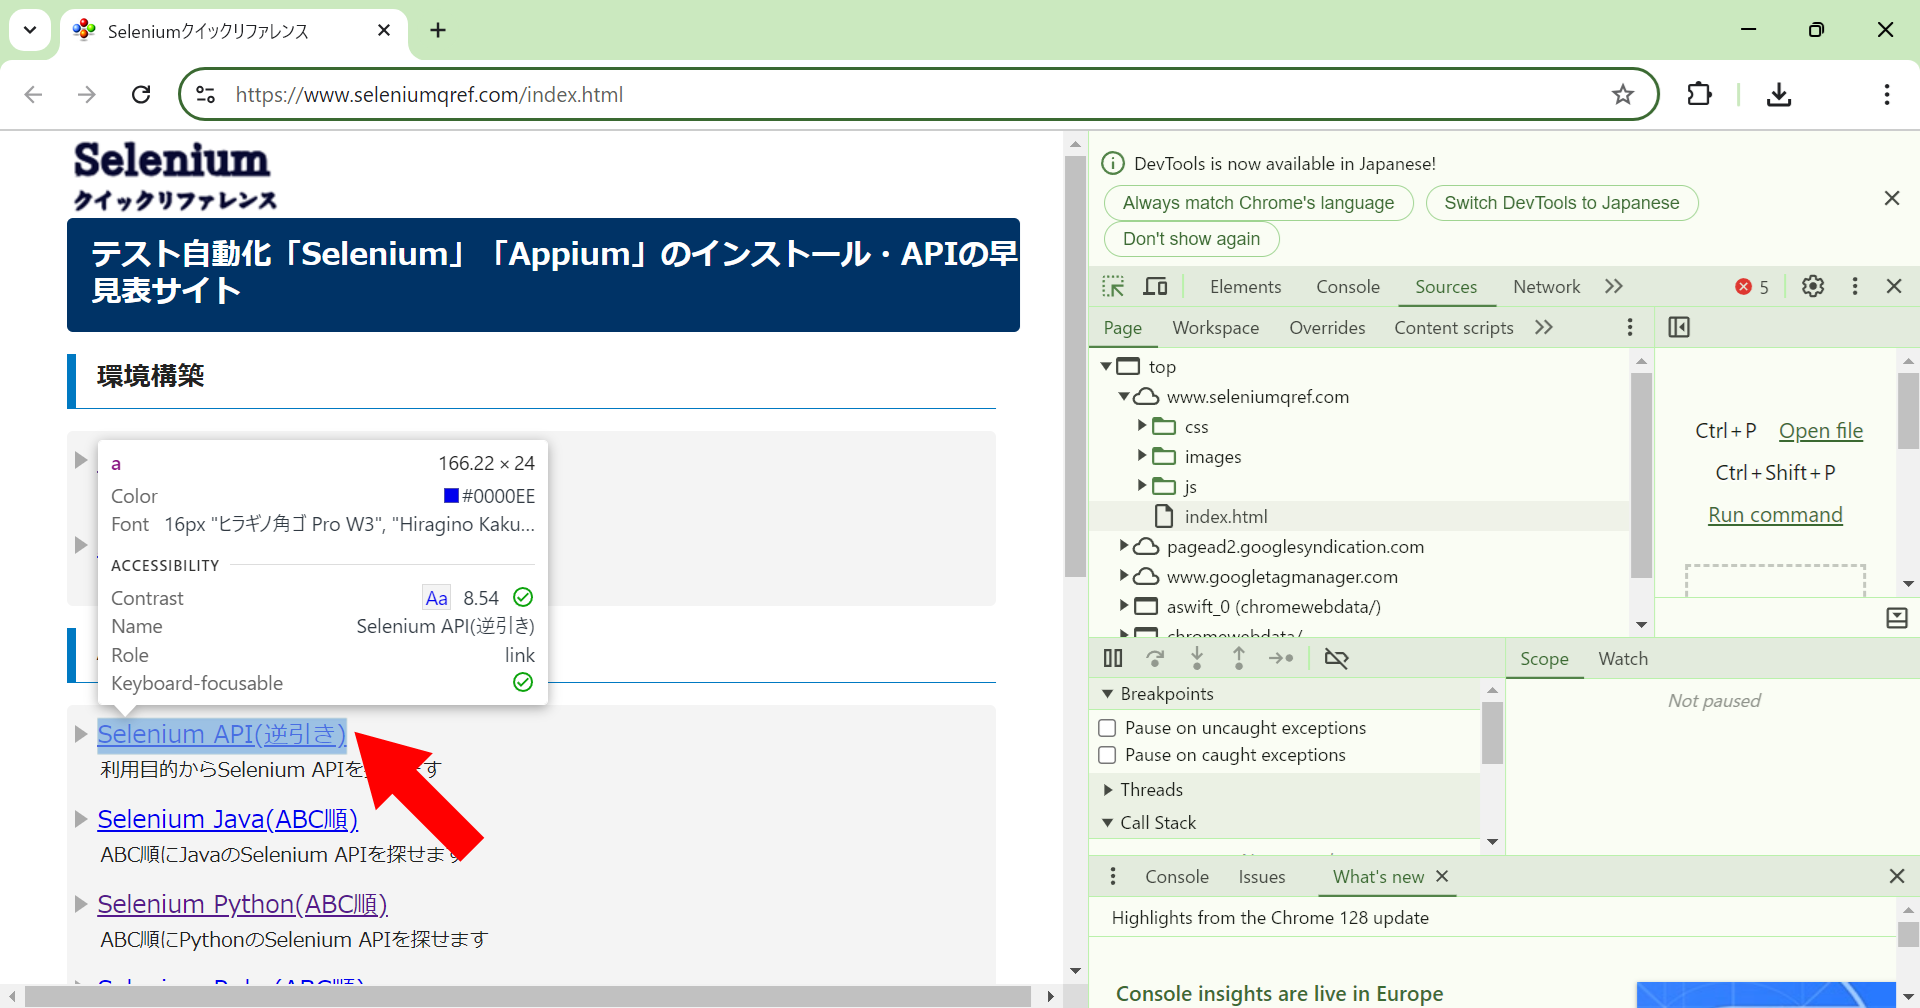
👆操作したい要素を選択します。
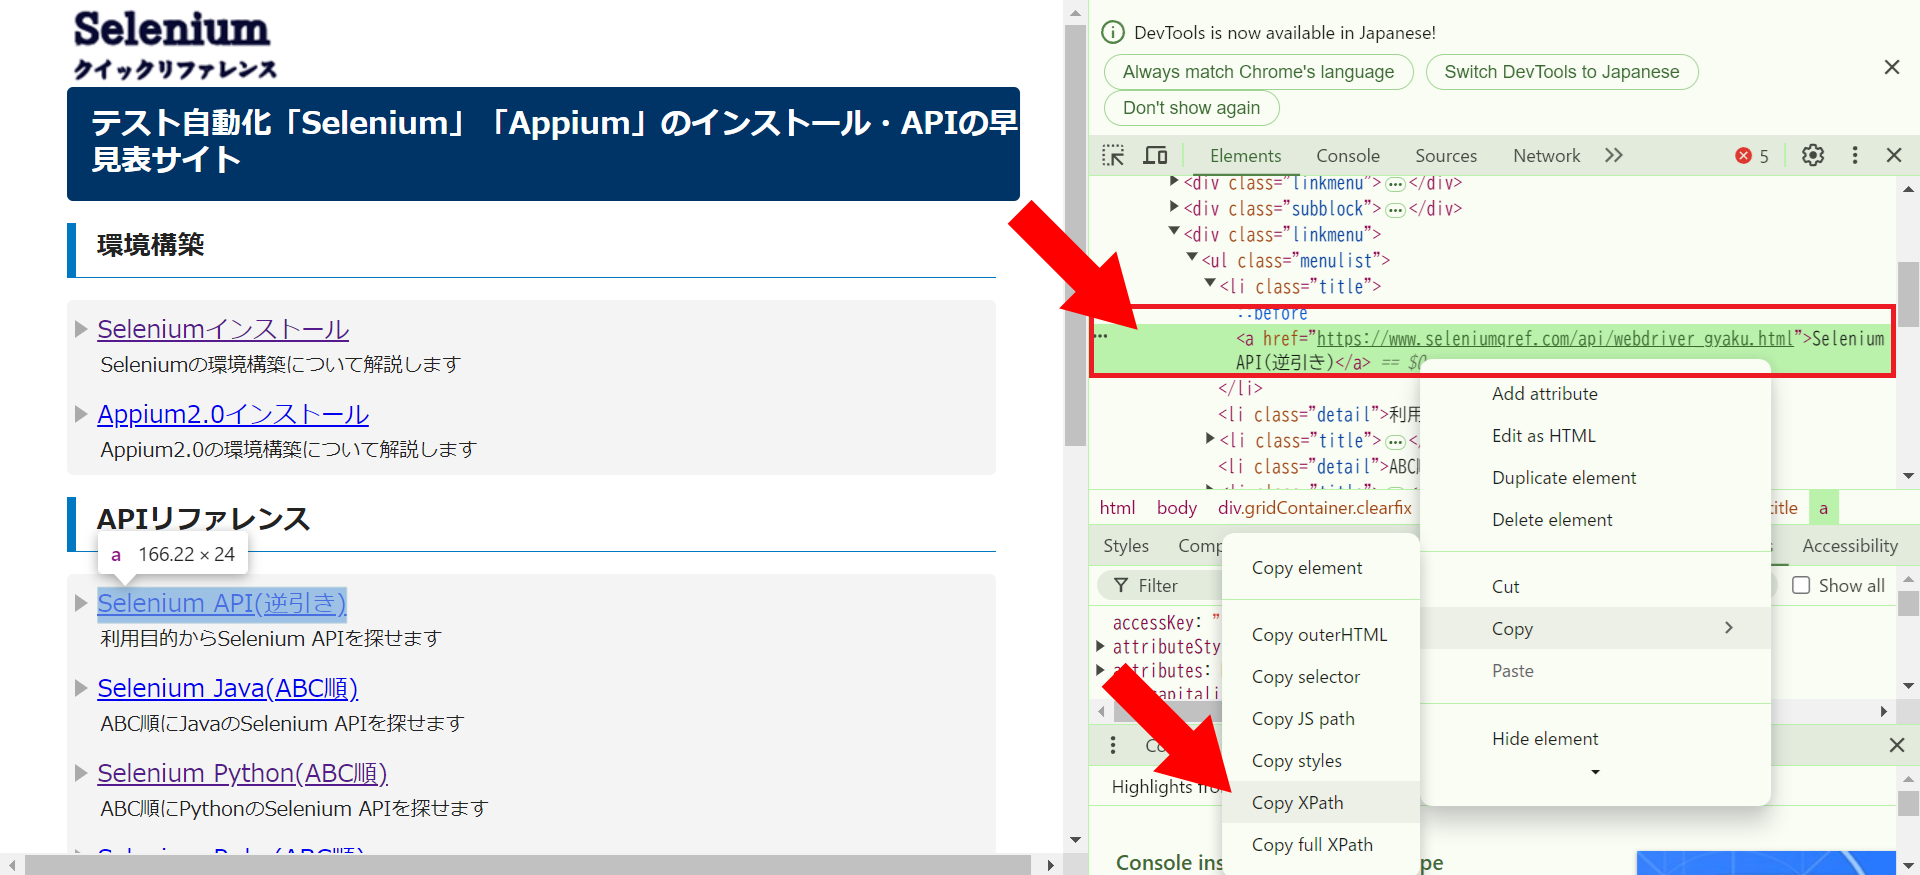
👆開発ツールの要素のソースコードがハイライトされるので、右クリックメニューから「Copy」-「Copy XPath」を選択します。
//*[@id="main"]/div[4]/ul/li[1]/a
👆こんな文字列がコピーできます。これがXPathです。
from selenium import webdriver
from selenium.webdriver.common.by import By

driver = webdriver.Chrome()
driver.get('https://www.seleniumqref.com/index.html')

driver.find_element(By.XPATH,'//*[@id="main"]/div[4]/ul/li[1]/a').click()
👆取得したXPathを使ってこんな感じで操作を自動化できます。
ファイルダウンロード
Seleniumでファイルダウンロードを自動化するサンプルコードを紹介します。
from selenium import webdriver
from selenium.webdriver.chrome.options import Options
from selenium.webdriver.common.by import By

download_dir = r"C:\home\files\download_csv"
chrome_options = Options()
chrome_options.add_experimental_option("prefs", {
    "download.default_directory": download_dir,
    "download.prompt_for_download": False,
    "download.directory_upgrade": True,
    "safebrowsing.enabled": True,
    "useAutomationExtension" : False
})
driver = webdriver.Chrome(options=chrome_options)

driver.get('https://...some site url')

driver.find_element(By.XPATH,"//span[text()='明細ダウンロード']").click()
確認ダイアログ操作
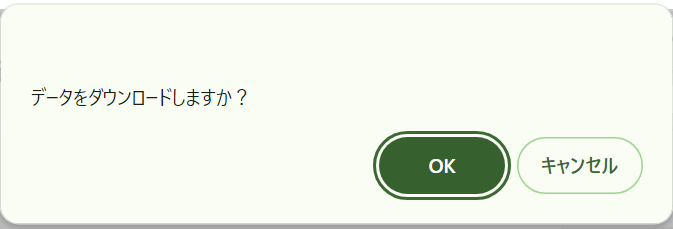
👆こんな感じの確認ダイアログをSeleniumで操作するサンプルコードを紹介します。
from selenium import webdriver
from selenium.webdriver.common.alert import Alert
from selenium.webdriver.common.by import By

driver = webdriver.Chrome()

driver.get('https://...some site url')

driver.find_element(By.XPATH,"//span[text()='明細ダウンロード']").click()
Alert(driver).accept()
👇関連記事
本記事へのリンク

https://docs.saurus12.com/python/selenium
👇参考URL
[keywords]
Python Selenium XPath ファイルダウンロード 確認ダイアログ
SeleniumでのXPath参照、ファイルダウンロード、確認ダイアログ操作を解説
更新日:2024年09月16日

