ESP32でのmicropythonを使ったAWS IoTへの接続
ESP32でのmicropythonを使ったAWS IoTへの接続について解説します。
参考サイト
Amazon Web Services ブログ MicroPython を使って AWS IoT Core を始める
このページを参考にとりあえずesp32からAWS IoTへの接続をやってみたのですが、
この手順をそのままやってもうまくいかなかったので、うまくいく方法を、忘備のため記事にします。
IoT ポリシーを作成する
Amazon Web Services ブログ MicroPython を使って AWS IoT Core を始める
ステップ1: IoT ポリシーを作成するのとおりポリシーを作成します。
👇ポリシードキュメントはこんな感じです。
    {
      "Version": "2012-10-17",
      "Statement": [
        {
          "Effect": "Allow",
          "Action": "iot:Connect",
          "Resource": "arn:aws:iot:ap-northeast-1:0000000000000:client/BlogClient"
        },
        {
          "Effect": "Allow",
          "Action": "iot:Publish",
          "Resource": "arn:aws:iot:ap-northeast-1:0000000000000:topic/$aws/things/BlogThing/shadow/update"
        },
        {
          "Effect": "Allow",
          "Action": "iot:Subscribe",
          "Resource": "arn:aws:iot:ap-northeast-1:0000000000000:topicfilter/$aws/things/BlogThing/shadow/update/delta"
        },
        {
          "Effect": "Allow",
          "Action": "iot:Receive",
          "Resource": "arn:aws:iot:ap-northeast-1:0000000000000:topic/$aws/things/BlogThing/shadow/update/delta"
        }
      ]
}
AWS IoT のモノを作成する
Amazon Web Services ブログ MicroPython を使って AWS IoT Core を始める
ステップ2: AWS IoT のモノを作成するのとおりモノを作成します。
でもさ、「モノを作成する」って・・・
デバイス証明書とキーファイルをダウンロード
Amazon Web Services ブログ MicroPython を使って AWS IoT Core を始める
ステップ2: AWS IoT のモノを作成するの最後の手順「デバイス証明書とキーファイル」をダウンロードします。
マイクロコントローラ用のファイルを準備する
Amazon Web Services ブログ MicroPython を使って AWS IoT Core を始める
ステップ3: マイクロコントローラ用のファイルを準備する
ここは注意が必要です
1.デバイス証明書と鍵のファイルをダウンロードしたローカルディスクに移動します。
👆これはこのままでOK
2.デバイス証明書は、-certificate.pem.crt で終わるファイルです。この証明書のファイル名を cert.pem.crt に変更します。
👆これもこのままでOK
3.秘密鍵は、-private.pem.key で終わるファイルです。このファイル名を private.pem.key に変更します。
👆これもこのままでOK
4.次に、MQTT に必要なライブラリーをダウンロードします。GitHub のリポジトリの内容をローカルディスクにダウンロードします。
👆この手順は不要(MQTTは最新のmicropythonでは標準で組み込まれてます。)
5.ファイルを整理するために、getting-started-micropython-esp32 というフォルダを作成します。証明書と秘密鍵のファイルをこのフォルダーに移動します。
👆これもこのままでOK
6.micropython-lib GitHub リポジトリの micropython/umqtt.simple/umqtt/simple.py というファイルを、ローカルディスクの getting-started-micropython-esp32 フォルダの umqtt フォルダにコピーします。
👆この手順は不要(MQTTは最新のmicropythonでは標準で組み込まれてます。)
7.getting-started-micropython-esp32 フォルダには、以下のファイルがあるはずです。
※ umqtt/simple.pyは不要です。
MicroPython を使用して AWS IoT に接続する
Amazon Web Services ブログ MicroPython を使って AWS IoT Core を始める
ステップ4: MicroPython を使用して AWS IoT に接続する
ここがひっかけポイントです!
1.getting-started-micropython-esp32 フォルダに、main.py というファイルを新規に作成します。
👆これはこのままでOK
2.GitHub の aws-iot-core-getting-started-micropython リポジトリから main.py のコードをコピーします。
👆これもこのままでOK
3.以下のコードを入力します。
a. wifi_ssid をお使いのワイヤレスネットワーク名に置き換えてください。
b. wifi_password をお使いのワイヤレスネットワークのパスワードに置き換えてください。
c. aws_endpoint を お使いの AWS アカウントの AWS IoT のエンドポイントに置き換えてください。AWS IoT Core コンソールの設定ペ�ージで確認することができます。
👆これもこのままでOK
追加で以下の編集が必要です
デバイス証明書とキーファイルは、読み込んだ文字列ではなく、ファイルを指定するようにssl_paramsを編集する。
#ssl_params = {"key":key, "cert":cert, "server_side":False}
ssl_params = {"key":private_key, "cert":private_cert, "server_side":False}
main.pyのサンプルコード
main.pyのサンプルコードを付けておきます。
とりあえずAWSとの接続が目的だったので、いらないところは全て削除しました。
import os
import time
import ujson
import machine
import network
from umqtt.simple import MQTTClient

#Enter your wifi SSID and password below.
wifi_ssid = "SSID*******"
wifi_password = "************"

#Enter your AWS IoT endpoint. You can find it in the Settings page of
#your AWS IoT Core console.
#https://docs.aws.amazon.com/iot/latest/developerguide/iot-connect-devices.html
aws_endpoint = b'********-ats.iot.ap-northeast-1.amazonaws.com'

#If you followed the blog, these names are already set.
thing_name = "BlogThing"
client_id = "BlogClient"
private_key = "private.pem.key"
private_cert = "cert.pem.crt"

#Read the files used to authenticate to AWS IoT Core
#with open(private_key, 'r') as f:
#    key = f.read()
#with open(private_cert, 'r') as f:
#    cert = f.read()

#These are the topics we will subscribe to. We will publish updates to /update.
#We will subscribe to the /update/delta topic to look for changes in the device shadow.
topic_pub = "$aws/things/" + thing_name + "/shadow/update"
topic_sub = "$aws/things/" + thing_name + "/shadow/update/delta"

#ssl_params = {"key":key, "cert":cert, "server_side":False}
ssl_params = {"key":private_key, "cert":private_cert, "server_side":False}

#Define pins for LED and light sensor. In this example we are using a FeatherS2.
#The sensor and LED are built into the board, and no external connections are required.
#light_sensor = machine.ADC(machine.Pin(4))
#light_sensor.atten(machine.ADC.ATTN_11DB)
#led = machine.Pin(13, machine.Pin.OUT)
info = os.uname()

#Connect to the wireless network
wlan = network.WLAN(network.STA_IF)
wlan.active(True)
if not wlan.isconnected():
    print('Connecting to network...')
    wlan.connect(wifi_ssid, wifi_password)
    while not wlan.isconnected():
        pass

    print('Connection successful')
    print('Network config:', wlan.ifconfig())

def mqtt_connect(client=client_id, endpoint=aws_endpoint, sslp=ssl_params):
    mqtt = MQTTClient(client_id=client, server=endpoint, port=8883, keepalive=1200, ssl=True, ssl_params=sslp)
    print("Connecting to AWS IoT...")
    mqtt.connect()
    print("Done")
    return mqtt

def mqtt_publish(client, topic=topic_pub, message=''):
    print("Publishing message...")
    client.publish(topic, message)
    print(message)

def mqtt_subscribe(topic, msg):
    print("Message received...")
    message = ujson.loads(msg)
    print(topic, message)
    # if message['state']['led']:
    #     led_state(message)
    print("Done")

#def led_state(message):
#    led.value(message['state']['led']['onboard'])

#We use our helper function to connect to AWS IoT Core.
#The callback function mqtt_subscribe is what will be called if we
#get a new message on topic_sub.
try:
    mqtt = mqtt_connect()
    mqtt.set_callback(mqtt_subscribe)
    mqtt.subscribe(topic_sub)
except:
    print("Unable to connect to MQTT.")


while True:
    try:
        mqtt.check_msg()
    except:
        print("Unable to check for messages.")

    mesg = ujson.dumps({
        "state":{
            "reported": {
                "device": {
                    "client": client_id,
                    "uptime": time.ticks_ms(),
                    "hardware": info[0],
                    "firmware": info[2]
                },
#                "sensors": {
#                    "light": light_sensor.read()
#                },
#                "led": {
#                    "onboard": led.value()
#                }
            }
        }
    })

#Using the message above, the device shadow is updated.
    try:
        mqtt_publish(client=mqtt, message=mesg)
    except:
        print("Unable to publish message.")

#Wait for 10 seconds before checking for messages and publishing a new update.
    print("Sleep for 10 seconds")
    time.sleep(10)
マイクロコントローラにファイルをコピーする
私はTonnyを使ってファイルをコピーしました。
main.py実行
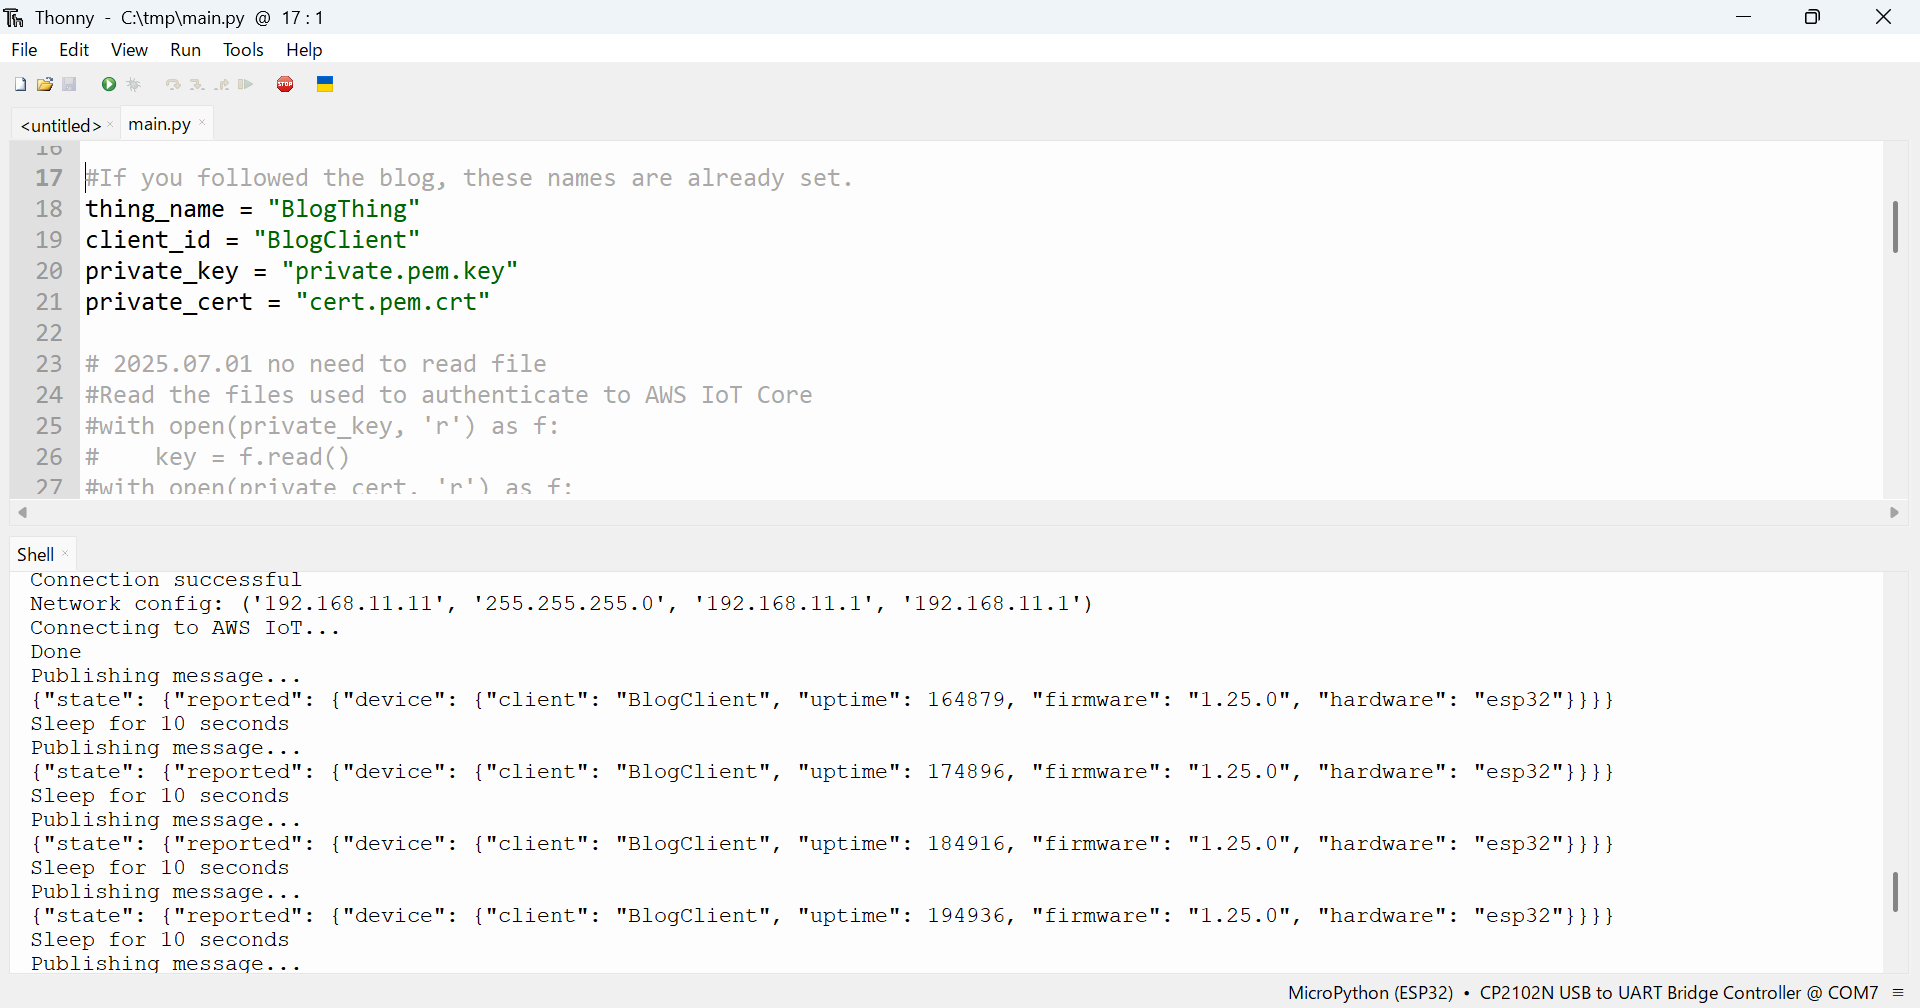
👆実行するとこんな感じになります。
メッセージのルーティング
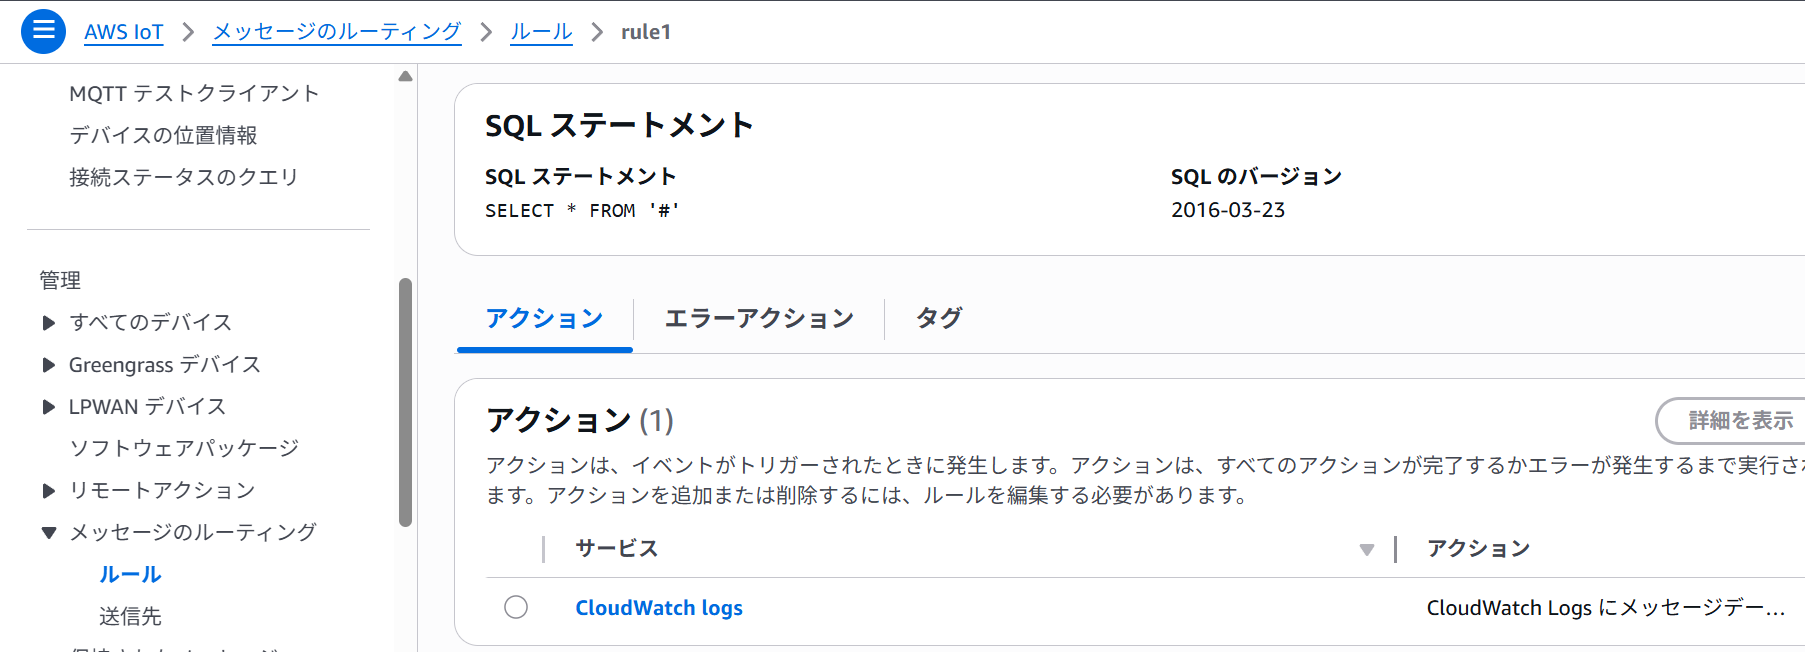
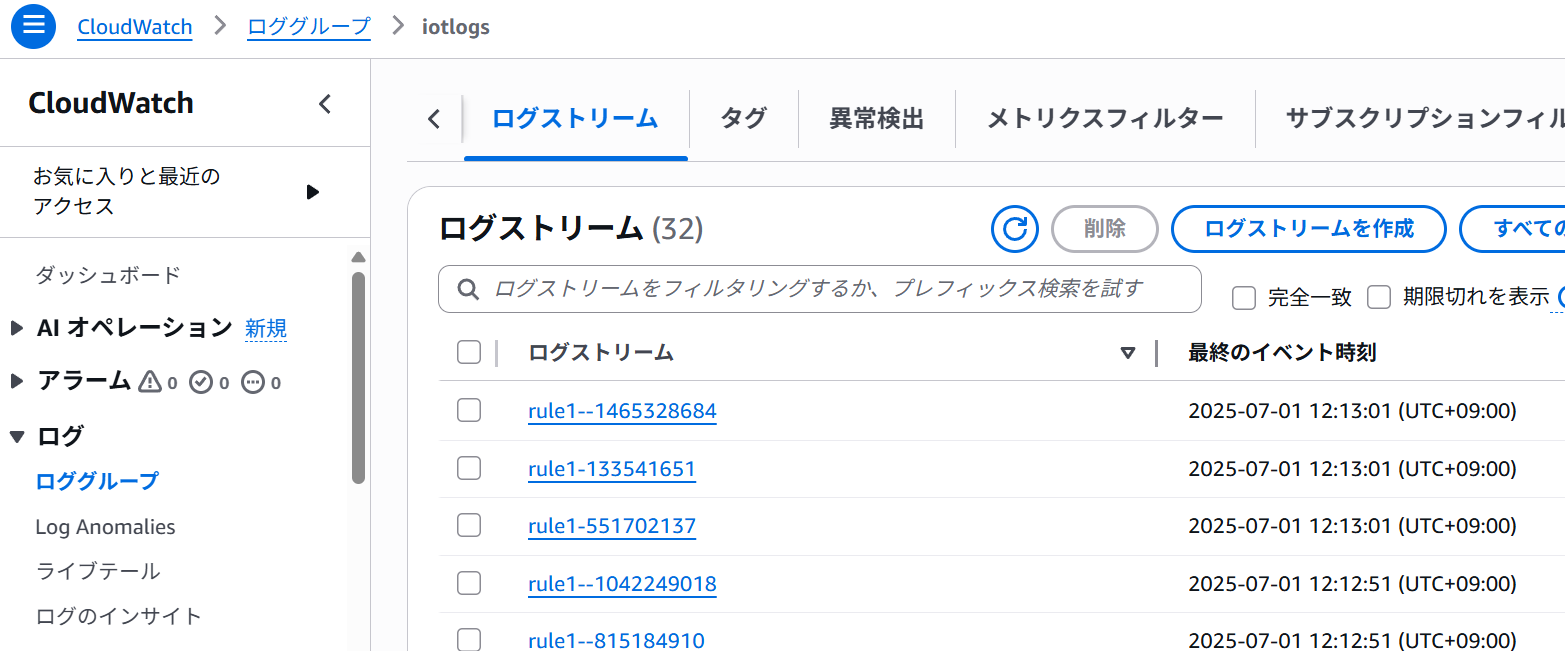
👆SQL ステートメントでSELECT * FROM '#'を指定して、アクションにCloudWatchを指定すれば
CloudWatchログで出力を確認できます。
👇関連記事
👇参考URL
Amazon Web Services ブログ MicroPython を使って AWS IoT Core を始める
本記事へのリンク
https://docs.saurus12.com/device/esp32_mqtt
[keywords]
ESP32 micropython mqtt AWS IoT
ESP32でのmicropythonを使ったAWS IoTへの接続
更新日:2025年07月01日

